Peter
 Carrhunger
I wanted to share this one picture with you and give you
a little background on the two things people seem most drawn
to.
Peter's outfit
The armour was custom made for Jeff (Peter) many years ago
and he was looking for a reason to wear it. But the red over
tunic he made with a little help from us. His friends.
Basic cotton was the fabric choice and he simply made it
out of a large square piece of fabric that we threw over his
head and pined where he needed to sew. The lion, on the other
hand, was a pattern we made up on the computer then printed
it out on iron down paper. We then ironed it onto white fabric,
cut it out, then glued it to the red tunic. Glue because any
heat based attachment method would destroy the pattern and
stitching would pucker it.
The other great thing about this shot is Lucy's dagger in
comparison to Peter's sword. We had bought the play kit but
was disappointed by the dagger that came with it so we made
her a new blade.
Blades and armour can be made out of styrene and then painted
with automotive paints in order to make them look like metals.
Even though her dagger doesn't have the same deep sheen his
sword does, people were very convinced that it was metal.
Note: If you decide to play with styrene for armor then
you have to bend it. Styrene will bend under heated conditions
but there are a few notes to be aware of.
If you use the oven. Do it slowly and gently. You can actually
poke it and when the poke leaves an indent, it is ready. Other
methods include heat based paint stripper guns.
Do not handle hot styrene with bare hands. Do not use your
own body for a form. Use a wood frame with something like
counter top sheeting. That stuff is flexable and can take
the heat. Create your frame to shape and pull the counter
top sheeting over it, screwing into place as you go. Take
the heated styrene and gently place it on top, stroking it
into place. Stay with it as it cools. You may have to stroke
it back down as a sheet has a memory and may still want to
stay straight.
Bend a sheet then carefully cut your shapes out of the bent
sheet (or section of). If you cut the shapes first it will
warp and stretch as you heat it and you will not have the
excess material in order to fix it. It's not easy cutting
on a curve but you'll have a greater chance of getting the
right shape.
Paint it after you are done.
OR... Vac form. You can talk to your local hobby store or
store display manufacturer about vac forming.
Image
Image
Slideshow video: Peter
Peter's Play Clothes
Will
Peter's Play Clothes outfit was obtained from already owned
clothing (light blue long sleve shirt, black shoes, and blue
slack) and the suspenders from a local second hand shop.
Peter costume
page
Edmund's Play
Clothes
James
Edmund's Play Clothes outfit was obtained from
already owned clothing (white shirt) and from a local second
hand shops (shoes, blue sweater). Edmund's shorts were originally
a long dress pair of GAP slacks mostly wool, some polyester
that were cut off at the knee. His socks are Dockers and were
purchased at JCPenny on sale.
Edmund
costume page
Edmund's Tunic Armor
James
Edmund's Tunic Armor is a combination of his Auburn Tunic
look and his Battle Armor. Edmund's undergarmet brown vest
was hand sewn and mimics the one pictured on page 150 of the
official movie companion. The pattern used was the Simplicity
5037 and the fabric came from Hancock Fabrics. The jeans,
shoes, plastic helmet, and real sword all belong to the actor.
The tabard fabric is also from Hancock's and the lion pattern
came from NarniaWeb.
Edmund
costume page
Peter's Tunic Armor
Will
Peter's Tunic Armor is a combination of his Auburn Tunic
look and his Battle Armor. Peter's undergarmet brown vest
was hand sewn and the picture on page 36 of the official movie
companion was used as a visual pattern. The basics for the
pattern came from the 5037 Simplicity pattern. The unique
vinyl-like fabric came from Hancock Fabrics. We should have
made this vest a little bigger because the vinyl fabric had
no give at all! The jeans, blue cotton jean shirt, shoes,
and belt all belonged to the actor. The sword was borrowed
from our Edmund actor. The tabard fabric is also from Hancock's
and the lion pattern came from NarniaWeb.
Peter costume
page
Peter - Battle
Armor
Jamie
On 10/31, people asked, "Who are you?"
On 12/09 they said, "I know who you are!"
Most of the information for making the outfit came from www.narniaweb.com
costume area.
We used the McCalls 3658 men's pattern and tried to size
it down. The lion pattern came from the website.
We also made a green cloak that came from the concept art.
We made the shield from masonite and painted it silver. We
bought the sword from a toy store. He really wanted the real
sword (from MR) but, well, we just couldn't afford it :-).
Image
 Peter's
Sword and Shield
Peter's
Sword and Shield
James
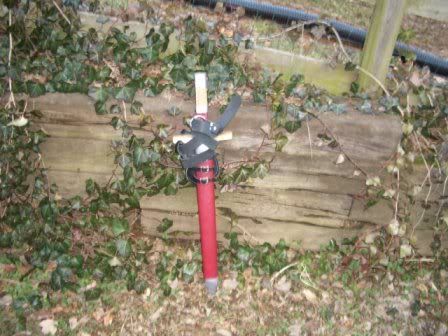
The sword is made from a piece of red oak I bought at lowes
for about 5 dollars. I cut out the tang and tapered the blade
to a point with a hand plane. The edges were made the same
way with the hand plane. I cut a shaped a scrap piece of pine
into a hand guard. The handle is wrapped half way with a maroon
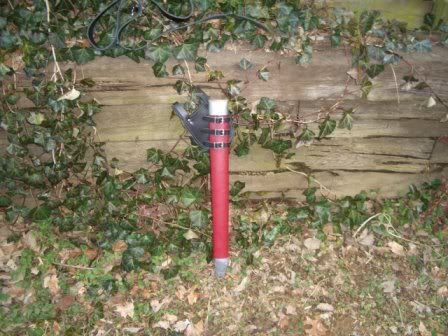
vinyl that i bought at hancock fabrics. The scabbard is made
from a cardboard tube that they wrap wrapping paper around.
I cut it in half and formed it around my sword. I taped it
up a bit to keep it from falling apart. Then Icovered it with
a tube I sewed from the same fabric I wrapped the handle with.
I duct taped the chape and mouth to keep the fabric from moving
and also as a decoration. The leather frog and belt were bought
at the local Rennaissance fair.
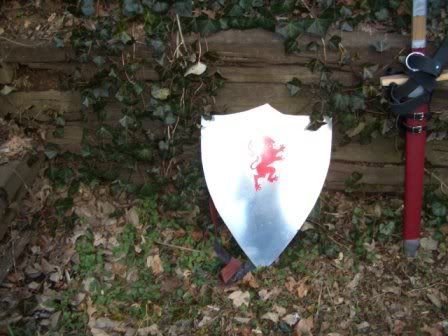
The shield was made from 2 pieces of 5/8 inch ply wood and
covered with sheet metal. The shield is slightly curved by
using ropes tightened to make it curve. The shield is painted
with the red lion from a pattern I found on this website.
Most of the hardware on the back is hand made. The shoulder
strap is made from a heavy brown upholstery fabric that is
leather like also found at hancock fabrics. It is attached
to the shield by buckles I made form a piece of sheet metal
folded over a d-ring of which I made 2. The upper hand hand
strap is 2 strips of leather and the lower one is the same
fabric as the shoulder strap. The padding is about an inch
of felt (because I use this in sword fights) covered in the
marroon vinyl.
The method for curving a shield and many other useful things
can be found here
in a downloadable pdf file the file link is called Basic Armouring
- A Practial Introduction to Armour Making.
Sword
Sword
Sword,
unsheathed
Scabbard
Sword
and Shield
Sword
and Shield
Back
of Shield
 Narnia
Knight
Narnia
Knight
Reverend Ron
This summer our church is hosting an event entitiled "The
Knights of Narnia."
Here are photos of my armour and attire. The surcoat is
made red cotton velvet and the lion is an applique of gold
velvet. I custom made the helmet visor and trimmed it with
brass rods that are soldered on with silver jewelry solder.
I made a lion stencil for the shield and the design is engraved
in the shield (Thank God for Dremel). I went with plate armour
for my legs and different gauntlets. The rest of the armour
is the spaulders (shoulders) and chainmail. Steel chainmail
is more affordable but man is it heavy! All of my
armour put together weighs 105 pounds.
When I put together this ensemble I went with the idea to
blend historical and functional armour with the Narnia realm.
Peter was the one who was "knighted" so the design
of his surcoat or tabbard, with the point facing down, must
be the standard for the knights of Narnia (Edmund had the
point inverted for the archers). I'm quite pleased how everything
turned out and I'm sure those who attend our event will enjoy
it.
Image
Image
